How to add an image to a page in Wordpress

Adding an image to a page in Wordpress is a simple and common process.
Step 1: Open the page that you want to add an image to
When you log into your Wordpress dashboard, you will see a "Pages" menu on the left sidebar.

Click the “Pages” menu, which will open the list of pages on your website. Choose the page you want to edit to open the page editor.
Step 2: Uploading the image
When the page editor is open, click the insert image button.

This will open a popup screen. Once it opens, click the “Select Files” button and find the image file on your computer.

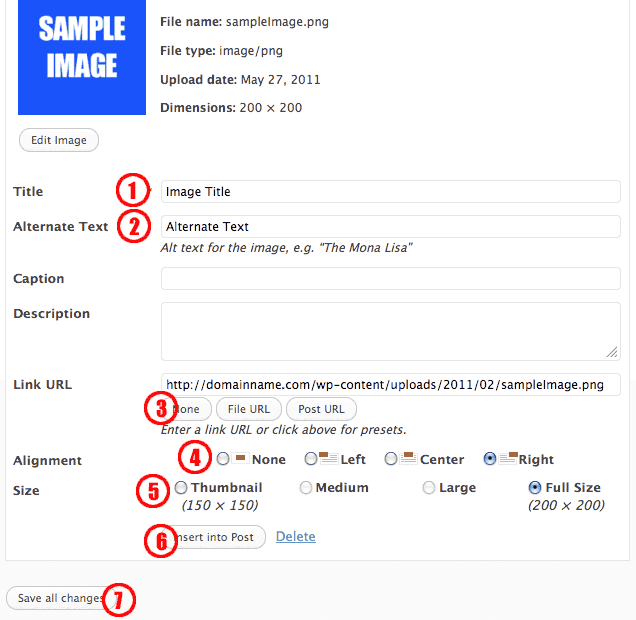
Next the image options need to be set. Give the image (#1 in the image below) a Title. The title shows up when a visitor hovers over the image. Use the title to describe the image when a visitor hovers over the picture. Give the image an (2) Alternate text. Alternate text shows up when the image can’t load. It is also good for search engines and users with disabilities. Click (3) “None” for the link URL. Choose (4) how you want the image to align with the text and a (5) size for the image. Then click (6) "Insert into Post” and (7) “Save all changes”.

The image will now be added to the page. Just click the “Update” button to save the changes and the image will be added to the website!


