Christmas Lights Photoshop Tutorial

By Keith Curreri • Published on November 9, 2011

I am going to show you how to create some Christmas lights in Photoshop in this free tutorial. You can use this design to make a Christmas card, holiday wallpaper, or use it to make something unique of your own. Check out the video tutorial if you get stuck or would like to follow along=.
Final Image Preview
Step 1: Creating the Bulb
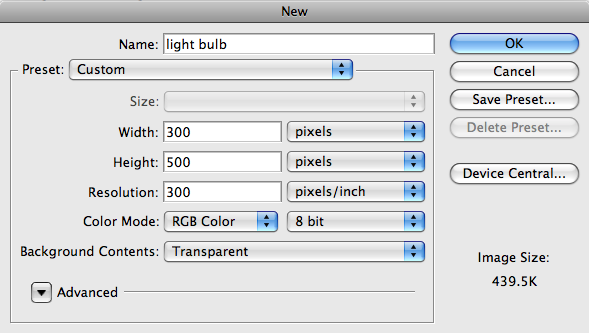
Start working by creating a new document (Ctrl+N) in Adobe Photoshop with a size of 300px wide by 500px high (in RGB color mode).
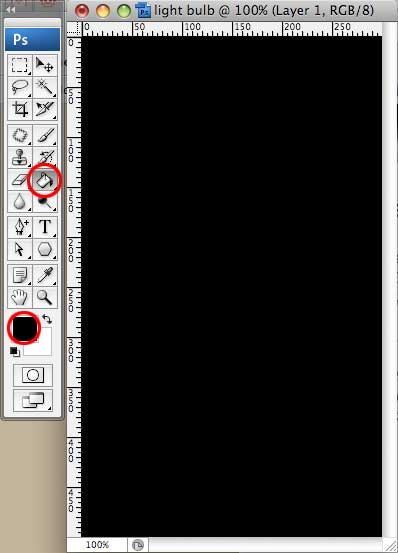
Fill the document with a black background using the Fill Tool
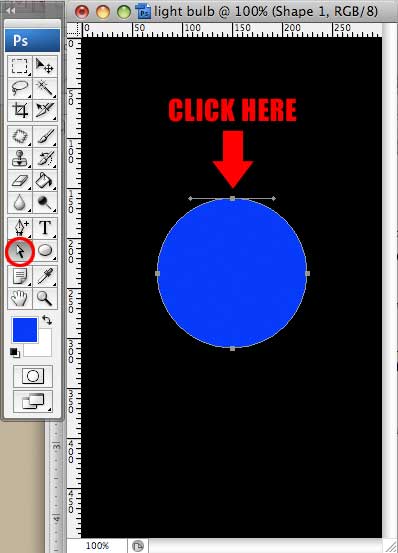
Create a circle in the middle of the document by using the Ellipse Tool. Don’t worry about the color for now since we will be changing it shortly. Make sure to hold down shift to make a perfect circle.

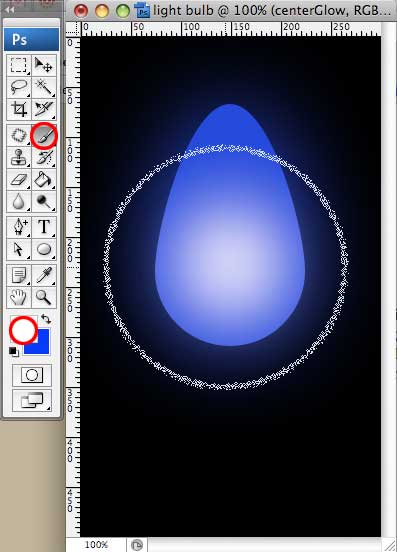
Grab the Direct Selection Tool (located under the “Path Selection Tool”) and then click at the very top of the circle to show the very top anchor point.
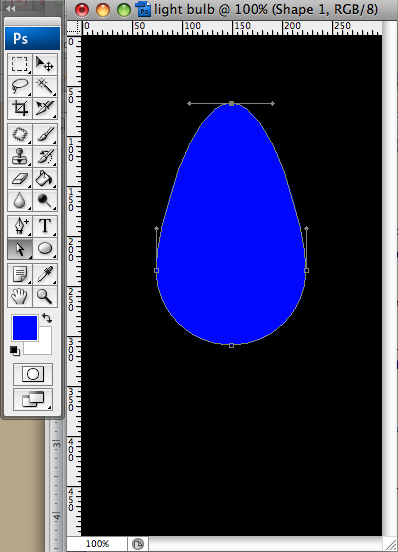
After clicking on the top of the circle with the Direct Selection Tool, hold shift and pull the top up to make the bulb shape.
Now we want to give the bulb some color and glow. In this tutorial we are going to start off making a blue bulb, and once the bulb is finished, I will show you how to change the color. In order to give the bulb some color we are going to change some blending options for the layer.
Click on Add a layer style icon for the bulb layer from the bottom part of the Layers panel and click Gradient Overlay:
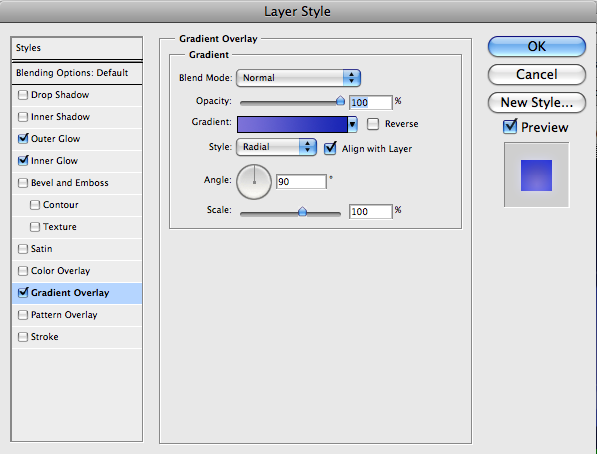
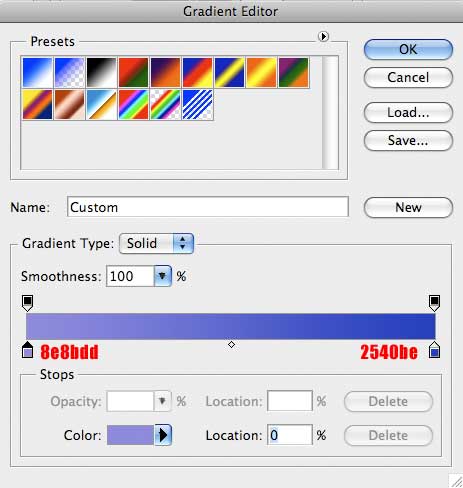
Click in the color bar to open the Gradient Editor and set the color stops as shown. Click OK to close the Gradient Editor dialog box.
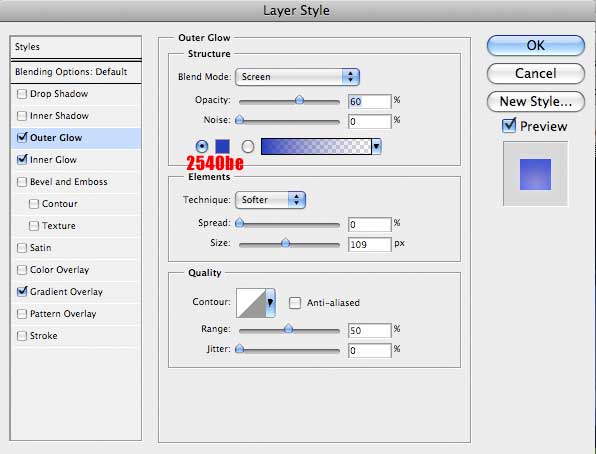
Then add an Outer Glow with the following settings:
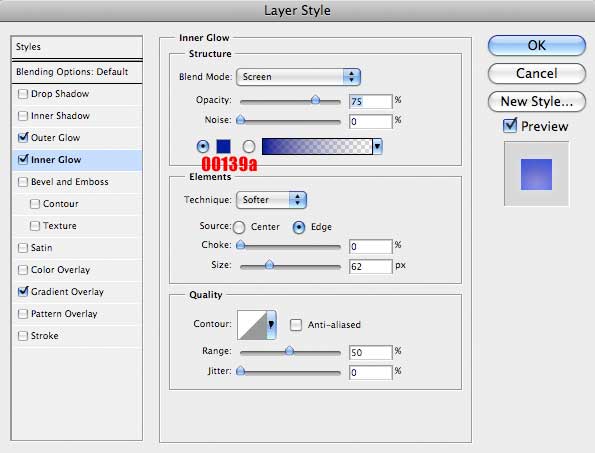
Finally add an Inner Glow with the following settings:
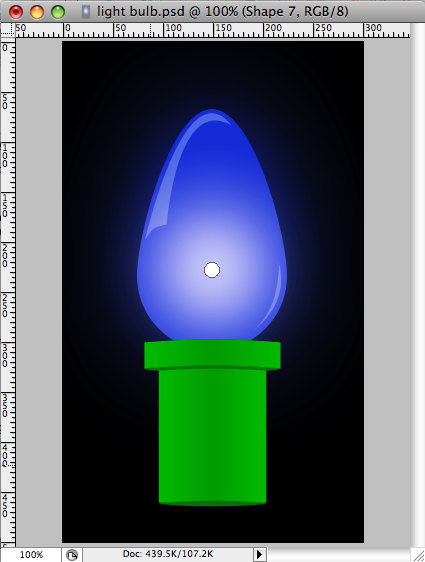
We are going to add a little more glow to the center of the bulb. Create a new layer (Ctrl + Shift + N) and name it “Center Glow”. Choose a 150px soft brush. Make sure to have the color white selected. Set the opacity of the brush to 20%. Then click in the center of the bulb 2 or 3 times with the brush. Don’t go over board with this, too little is better than too much.
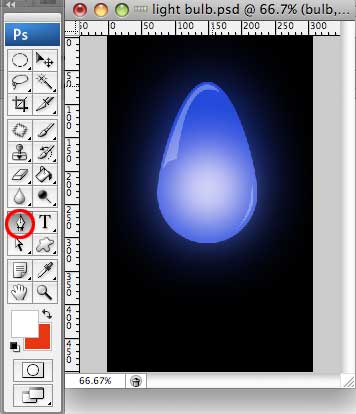
We are going to add some shine to the bulb using the pen tool. Create the shapes that I did below and then set their layers to 30% opacity. (Note: the pen tool can be tricky for some beginners, if you are having trouble, check out the video tutorial.
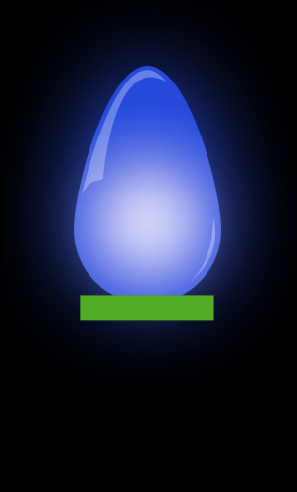
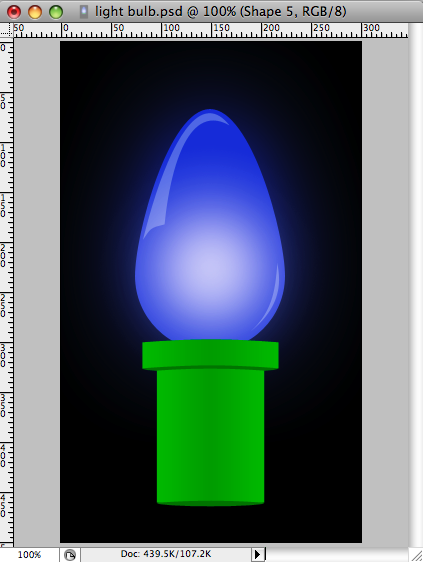
Step 2: Making the base
Start off by making a green rectangle like below using the Rectangle Tool. Don’t get too hung up on the color since we will be changing it in a minute.
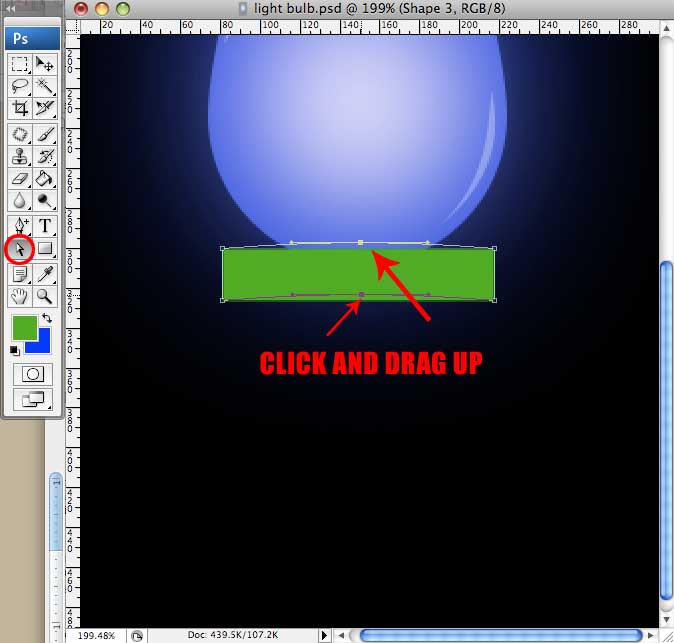
Now take the Add Anchor Point Tool (located under the Pen Tool) and add two new anchor points to the rectangle. One in the middle of the top line, and one in the middle of the bottom line.
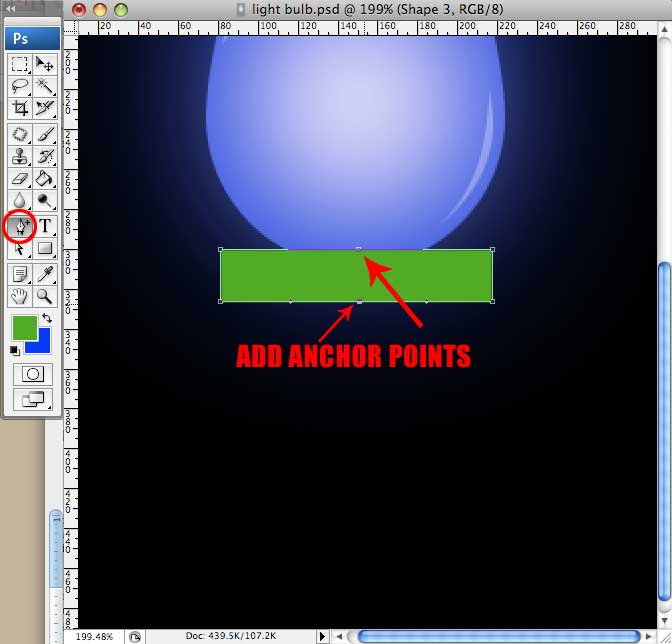
When you have added the two new anchor points, grab the Direct Selection Tool, and click the top new anchor point, hold shift, and then click the bottom anchor point. This will select both of the anchor points together. Keep holding shift and drag the point up just slightly to give the rectangle a curve.
Next we want to add an ellipse to fill out the bottom. Select the Ellipse Tool and a slightly darker green (I used #009b0f) and draw an ellipse beneath the previous rectangle. Once the ellipse is drawn make sure to move the ellipse layer under the rectangle layer.

Next is the second half of our base. The process is the same as the top rectangle, just start out by making a taller and slightly thinner rectangle.
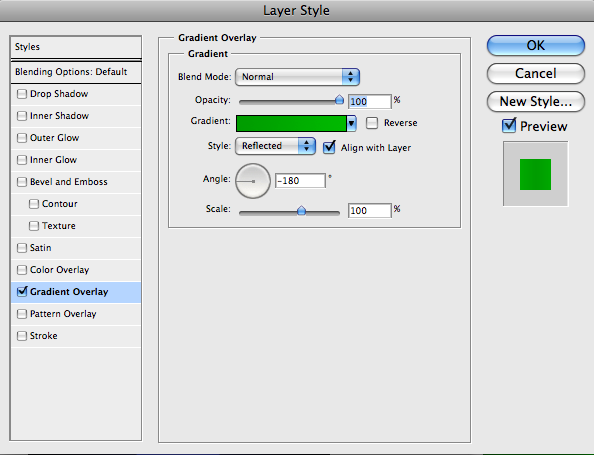
Next, lets add a little depth to the base with a gradient overlay. Select the first, smaller rectangle and click on the Add a layer style icon from bottom part of the Layers panel and select Gradient Overlay. Use the following settings:
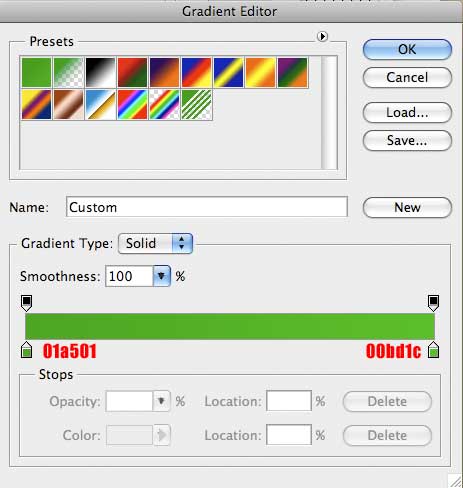
Click in the color bar to open the Gradient Editor and set the color stops as shown. Click OK to close the Gradient Editor dialog box.
Add the same layer styles to the second, longer rectangle. Your base should now look like this:
Step 3: Adding Streaks of Light
The last thing to do is to add one more light layer on top of all of the other layers.
Select the Polygon Tool and give it 15 sides. (To add sides see the toolbar at the top of the screen) Draw a small, white polygon in the center of the bulb. (It will look like a circle since the size is so small.)
Using the Direct Selection Tool again, click on the new white circle and pull out four points in different directions.
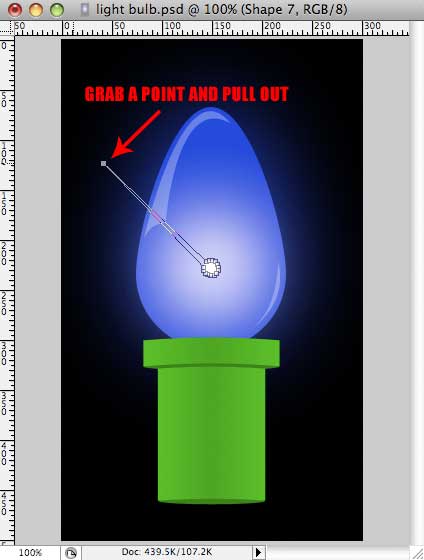
When the four points are pulled out, your result should look similar to this:

Apply a Gaussian Blur (Filter > Blur >Gaussian Blur) with a radius of 1.5 px.

Then set the opacity of the layer to 30%.
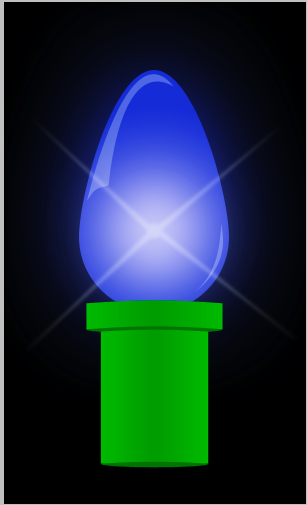
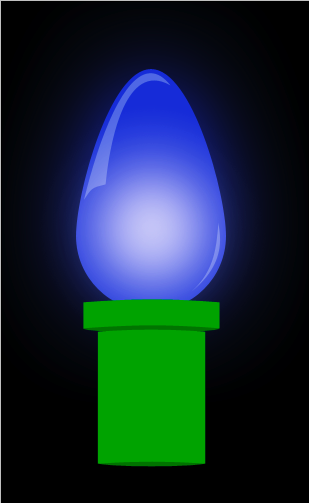
There you have it a finished light bulb and base!
Step 4: Changing the color of the bulb
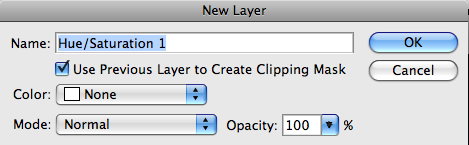
Changing the color of the bulb is simple using Adjustment Layers. Merge the bulb layer with the 2 pen shine layers. Add a Hue/Saturation layer (Layer -> New Adjustment Layer -> Hue/Saturation) make sure the “Use Previous Layer to Create Clipping Mask” checkbox is checked.
Now slide the Hue bar to change the color of the bulb.
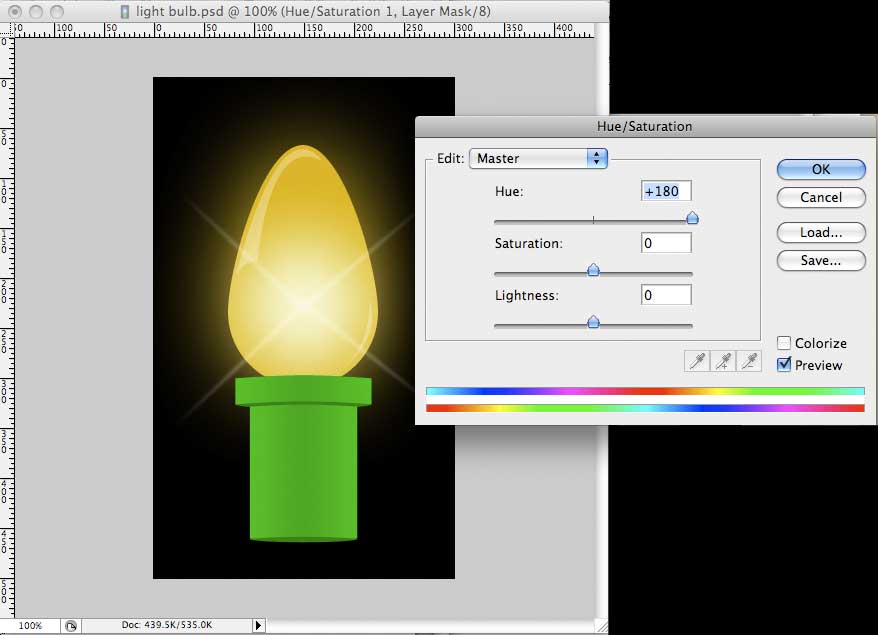
There you have it, finished multicolored Christmas lights from scratch in Photoshop. Be sure to check out the video tutorial if you get stuck or confused. Also check out part two of this tutorial where I show you how to use a light bulb to make a string of lights.
